Using front and rear Daytime Running Lights on every ride is a proven way to boost your visibility. But it’s important to mount them properly in order to get the most benefit. Learn how to install them correctly by following along with our step-by-step video and the instructions below.

Step-by-step mounting instructions for Bontrager lights
While any Bontrager light can be attached to any Bontrager bracket, each light comes packaged with the bracket that’s designed to work best for that particular light.
Mounting your rear light
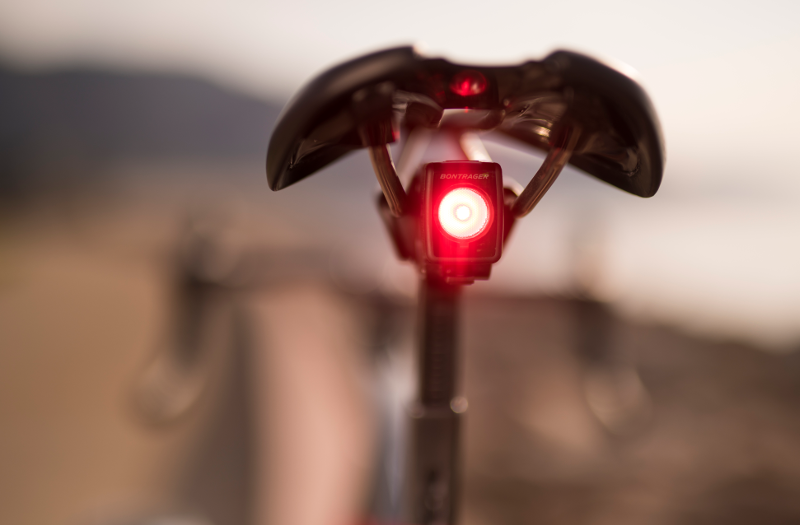
1) Check to make sure you are using the quick connect bracket designed for the rear light—it’s wedge-shaped and it will have a saddle icon on it, right next to the strap’s hook.
Note: the wedge shape counteracts the angle of the seatpost so that the rear light is always parallel to the ground. This way the light is thrown directly behind you, giving you the greatest visible range and ensuring that drivers can see you.
2) Hold the bracket so that the widest part of the wedge faces the ground and the saddle icon is upright.
3) Place the light near the top of the seatpost, but low enough that the light will not be blocked by a bag or seatpack.
4) Attach the quick connect bracket to your seatpost by stretching the rubber straps around your seatpost.
5) Then, catch the hook securely through a notch on the strap. The tab on the hook will hold any excess strap in place.

Mounting your front light
Note: Heavy-duty lights, like the Ion 800 R, will use an adjustable hard-mount bracket. Lighter-weight lights, like the Ion 100 R, will use a rubber quick connect bracket.
If your light has an adjustable hard-mount bracket:
1) First make sure the bracket is set to fit the circumference of your handlebars.
2) Unscrew the bracket and place it around your handlebar.
3) Once you’ve positioned the bracket so that the light is parallel to the ground, secure the mount by hand-tightening the screw until it’s finger tight.
If your front light has a quick connect bracket:
1) Attach it to your handlebar by holding the strap so the light is parallel to the ground.
2) Then, stretch the rubber straps around the handlebar and catch the hook securely through a notch on the strap.
How to remove your lights for charging and cleaning
You don’t need to remove the bracket itself to charge or clean your lights! Simply press down on the release lever and slide the light off of the bracket. To replace the light, slide it back onto the bracket until you hear it click into place. Make sure that the USB port cover is securely closed to keep out any water or debris!
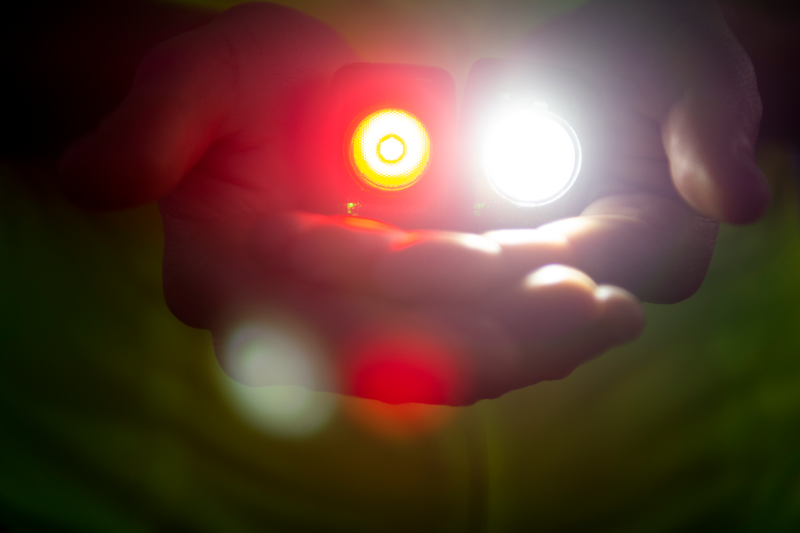
What’s special about Daytime Running Lights and why should I use them?
Research shows the single most impactful measure you can take to stand out to motorists is to use front and rear Daytime Running Lights (DRLs) on every ride, no matter the time of day. But not all lights are created equal.
A true DRL is designed with specific focus, flash, and range to be seen from a meaningful distance during daylight hours. Without these three things, you just have a light. That’s why every Bontrager Daytime Running Light is built for optimal performance in all three areas.
Daytime Running Lights

About the Author: Trek
Our mission: we build only products we love, provide incredible hospitality to our customers, and change the world by getting more people on bikes.