It is a nightmare for any cyclist— you’re halfway through a bike ride when your tyre begins to feel “lumpy”, with a “bump, bump, bump” every time the wheel goes around. You pull off to the side of the track to examine the tyre, and your fears are confirmed. It’s flat.
If you had come prepared, of course, this would be a minor problem, but without the right tools and experience, you’re stuck kilometers from your car, with no easy way to get back.
You can reduce the likelihood of getting a flat tyre by replacing your tyres when they start to wear out, but even then, it only takes a sharp piece of glass or a thorn, and you’ll have a flat. For all riders, this problem is likely to happen at some point, so since your chances of avoiding this situation are slim, it is best to be prepared.
What causes flat tyres?
Firstly, it is important to get our terms correct. While it is often called a flat tyre, it is actually a flat tube. Therefore the actual tyre will not need to be replaced, but a new tube will need to be installed. But why do the tubes go flat with that protective layer of thick rubber tyre around them?
When road cycling, the culprit is often glass, a rock, or just a big bump. You’re most likely to have to fix a flat tyre (or more accurately, an inner flat tube) when it’s getting old. As a narrow road tyre wears down, the contact surface expands. This wider contact area makes it more likely to pick up a sharp object from the road. The tyre also grows thinner with more wear, providing less of a protective barrier for the tube.
Occasionally though, you can get a bad tyre or tube, or put the new one on wrong. If that’s the case, you’ll know quickly, probably on the first ride. For this reason, it is important to give yourself time to try out new tyres before a big ride or event.
Come prepared
Bicycle flats are part of cycling. Some riders can even get more than one flat on a single ride.
For casual riders who ride close to home or only a short distance away from their car, a portable kit is not usually needed. If you’re not going to be able to walk your bike to your car or home, you should take tubes with you. It is recommended that you bring two spare tubes, and more if you’re going on a ride that’s more than 50km. Riders often keep spares in their jersey pockets.
As well as the tubes, you should also bring a pump, or for more serious riders, CO2 cartridges that can be used to refill your tyre within seconds.
Other important tools are two valve adaptors and two tire levers for prying the tyre off the rim.
8 Steps to changing your flat tyre
With the correct equipment and experience, you can change a flat bike tyre and be back riding in 10 minutes flat.

1. Take the wheel Off
Taking the wheel off is the easy part, as most wheels have a quick-release or through-axle mechanism. If your flat is the back tyre, you will need to change your gear to the smallest cog, which is furthest from the bike frame. This is because your derailleur will spring to this position when you remove the chain.
On most modern mountain bikes, a quick-release style thru-axle system, or an Allen key thru-axle system to remove a wheel. For either system, the steps are the same. You will need a multi-tool or a 6mm Allen key. To enable to tyre to pass the brake pads, insert the Allen key into the center of the axle, and loosen it anti-clockwise until it is completely removed from the bike. The wheel can then be easily removed. Be sure not to squeeze the brake leaver while the wheel is not connected to ensure the brake pads do not get jammed. To learn more about removing your back wheel, explore or blog on removing and installing bike wheels.
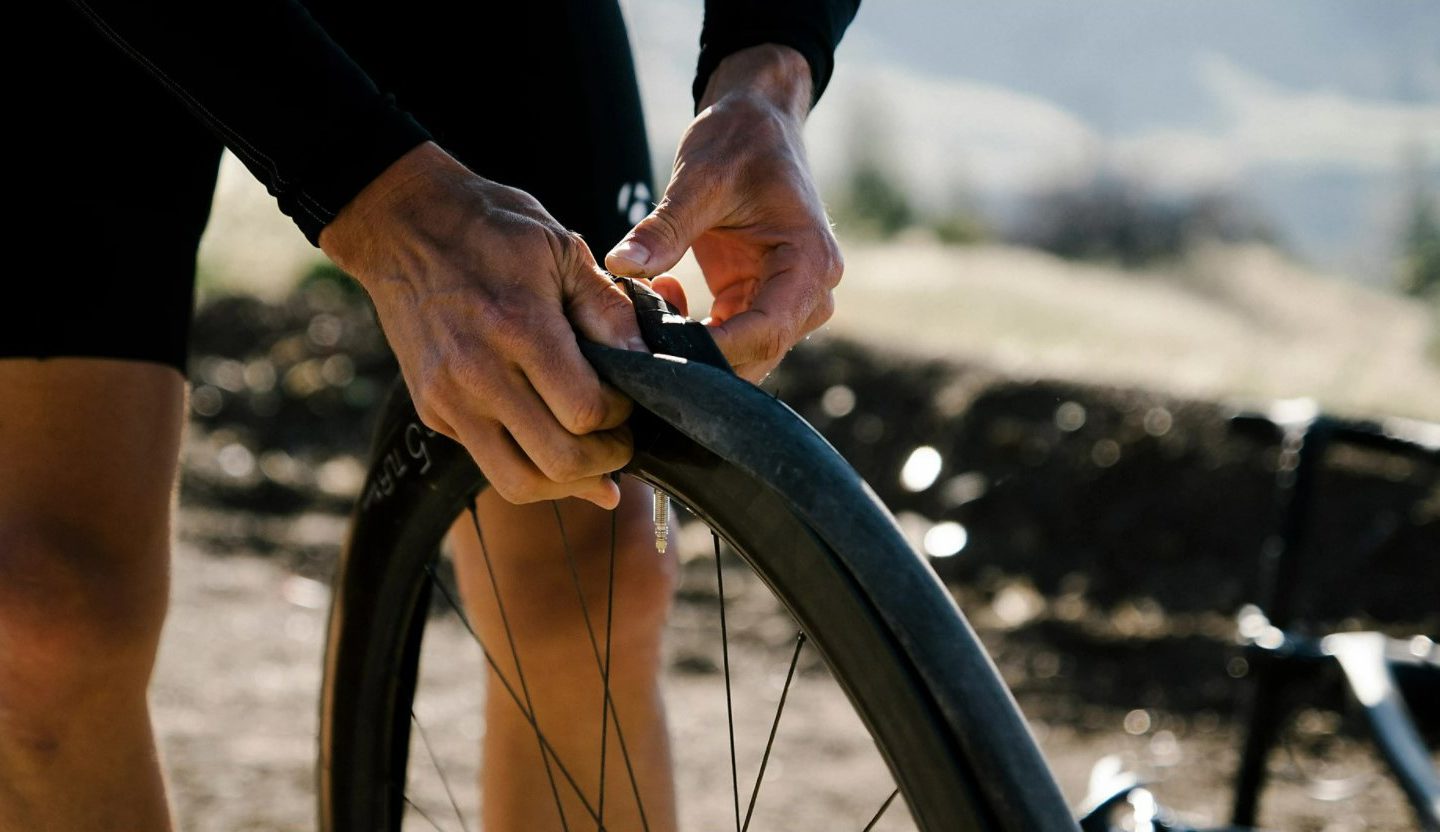
2. Separate the tyre from the wheel
Once the wheel is removed from the bike, let out all remaining air from the tube. This will make it easier to remove from the rim. You’ll then need your tyre leavers to remove the tyre.
Beginning at the opposite side to the valve stem, carefully use the pointed end of one leaver to pry the tyre and tube off the rim. If there is any resistance, use a second tyre leaver – about 10 centimeters apart from the first.
As the tyre separates from the rim, gently move the leaver around the tyre, until the tyre is completely loose from the wheel.
3. Pull the tube partially out
Before you completely remove the flat tyre, you need to locate the hole. If you do not do this, the object might still be in the tyre, ready to puncture your new tube.
Starting at the furthest point from the valve stem, pull the tube out of the tyre all the way, leaving about 5-8 centimeters on each side of
the valve.
3. Find the hole and remove the culprit
While the flat tube is still partially attached, use a hand pump to blow it up. You should be able to hear where the air is escaping. You could also use your hand to feel where the air is seeping out. If you are certain this was caused by a big bump, you can skip this step.
When you find the hole, line it up with the tyre to find the lodged object and remove it. In most cases, the tyre will not need repairing. If the wall of the tyre is damaged, you can cover it with an old piece of tyre or even a $5 note, as a temporary fix.
5. Remove and replace the tube
Once you are sure that there is nothing left in your tyre that may ruin your new tube, you can completely remove the old one. Before inserting the new tube, blow it up slightly to keep it from getting twisted and folded within the tire.
Once it is partially blown up, begin by seating the valve stem where it fits. Then work the tube around the tyre from both sides of the valve, until it is all the way inside the tyre.
6. Put the tyre back on your wheel
This is the most difficult step of repairing a flat bicycle tyre. Starting at the valve again, push the tyre up from the inside of the tyre, over the rim, so that it sits higher than it would normally on the road. This will give you enough clearance to get the tyre around the rim first at the valve stem.
Now work your way around from both sides of the stem, until you reach the furthest point from it. The last 20 centimeters is going to be the hardest part. It is recommended that you use the palm of your hands to push the tyre onto the wheel. Gloves can also be used to protect your hands further.
While some people use the tyre leavers to get those last few centimeters around, there is a risk of inadvertently puncturing your new tube in the process.
7. Make sure the tyre is seated properly
To ensure your tyre is seated properly, carefully examine all the way around the wheel on both sides. You need to look out for any sign that it may not be seated right. The ridge above the rim should be consistent the entire way around.
8. Inflate and check again
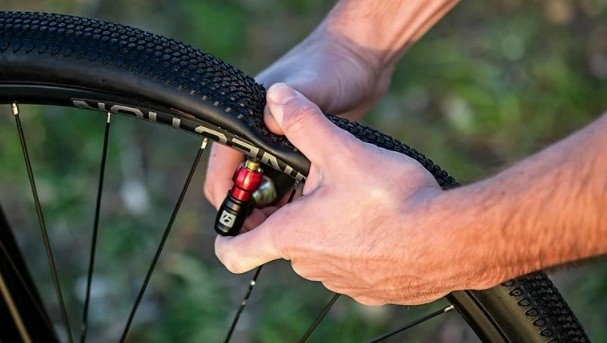
This is where the small CO2 cartridges can come in handy to save time and effort, although it can be done with a bike pump. It is easy to overfill and even burst your tube with these cartridges, so be careful.
You can attach the cartridge to the adaptor valve, screwing it all the way in and positioning the valve on your wheel towards the ground to avoid leaking CO2. Then you’ll need to tighten the other end of the valve adaptor all the way onto the valve of the tyre.
Then, unscrew the tank just enough to release the CO2 into the tyre, while holding your hand on the tyre to check its pressure as it fills. When the tyre is full enough, tighten the tank back down to stop airflow.
Want more detail? Click here for an easy-to-follow video that shows you the steps.
Tubes & tubeless accessories

About the Author: Trek
Our mission: we build only products we love, provide incredible hospitality to our customers, and change the world by getting more people on bikes.